THE FIRST START

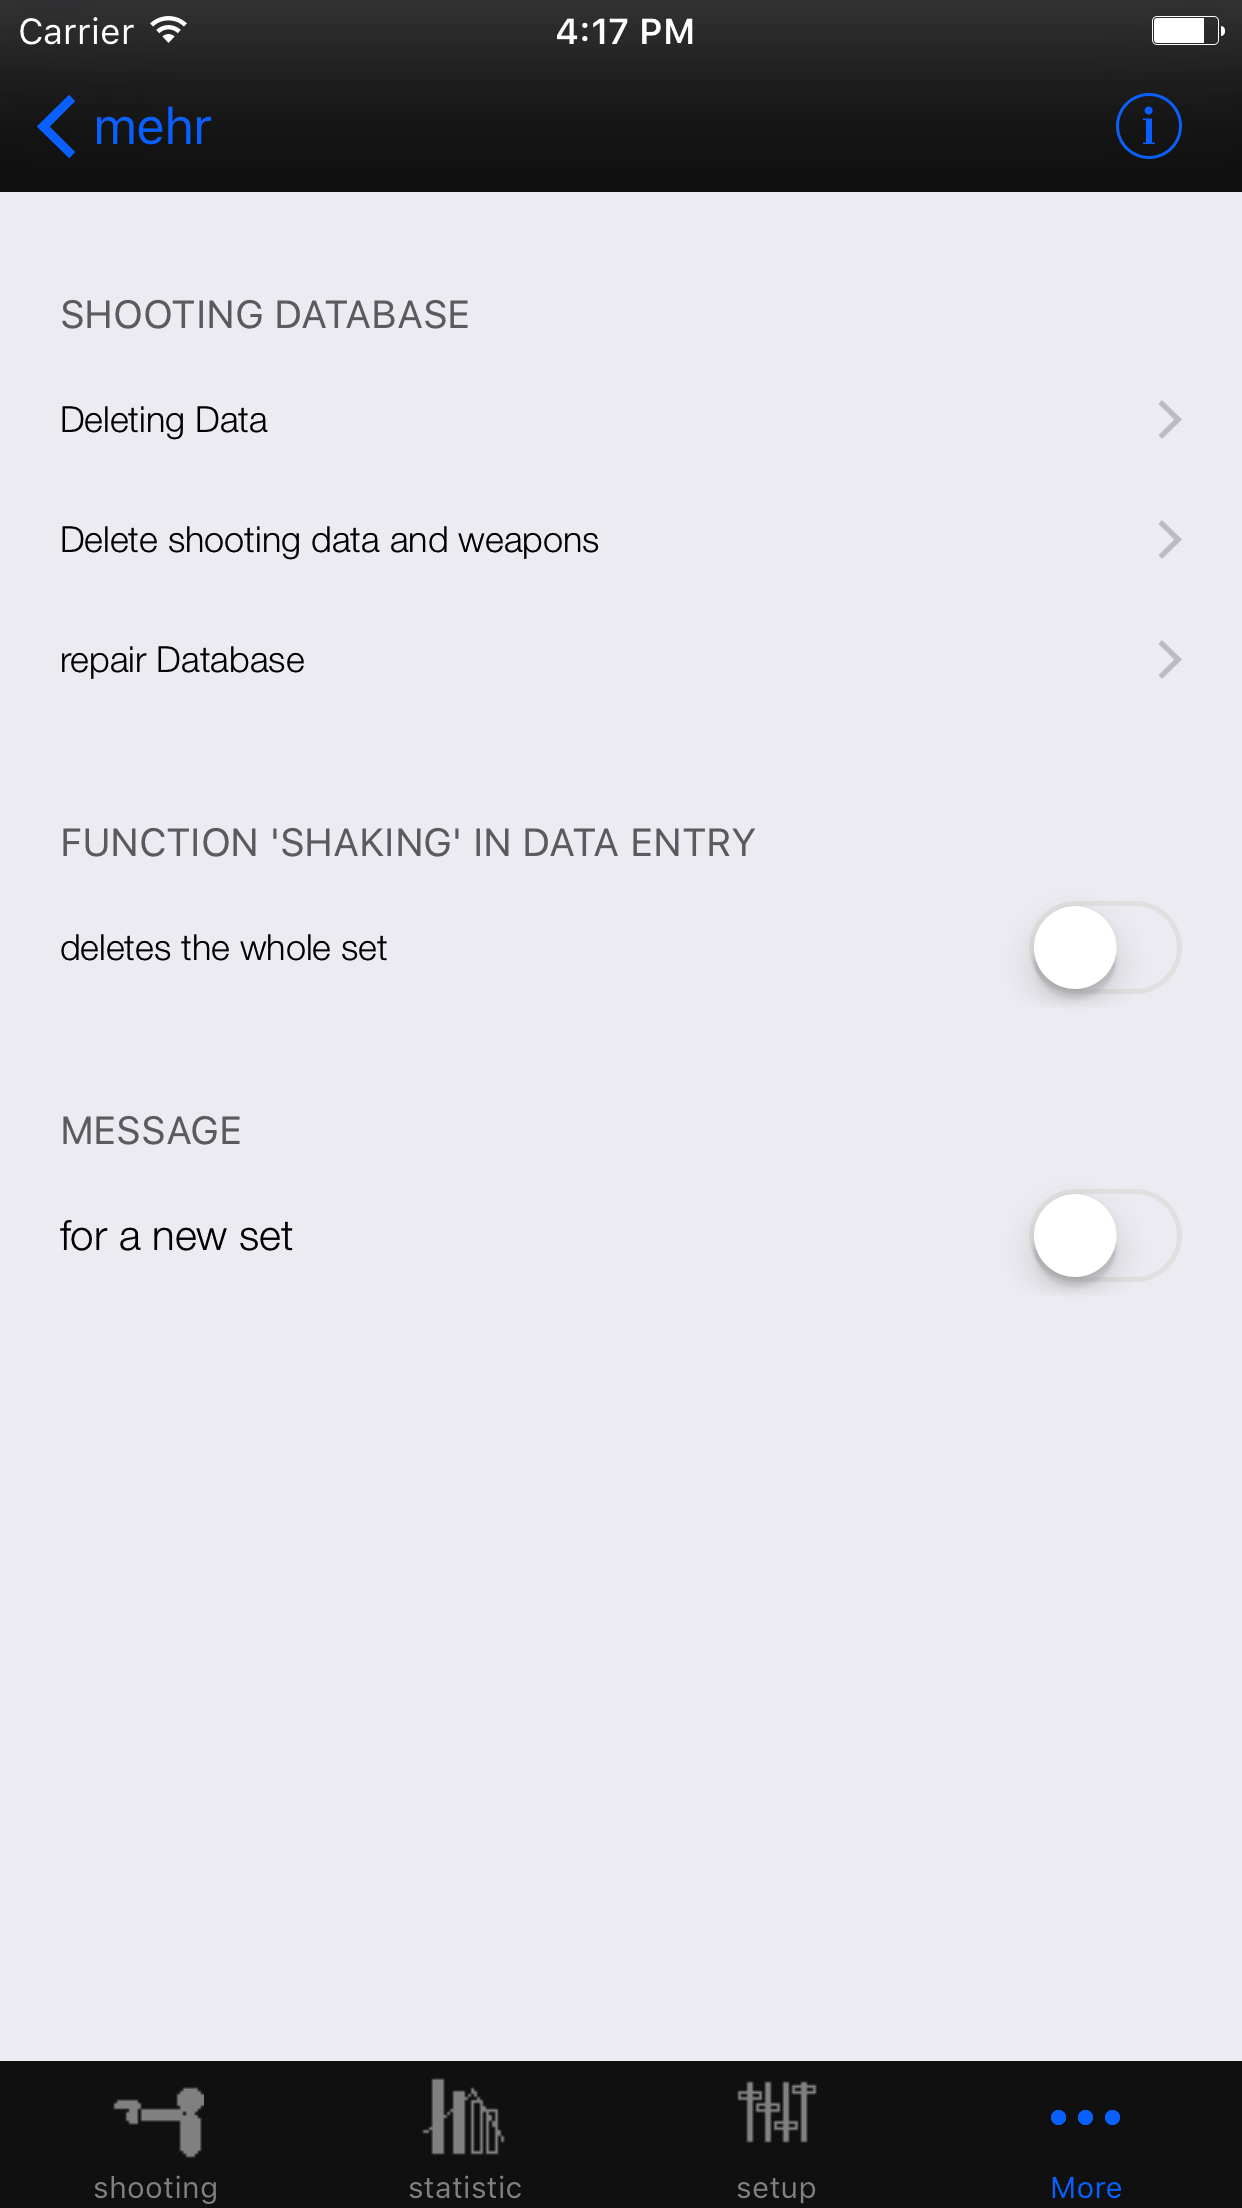
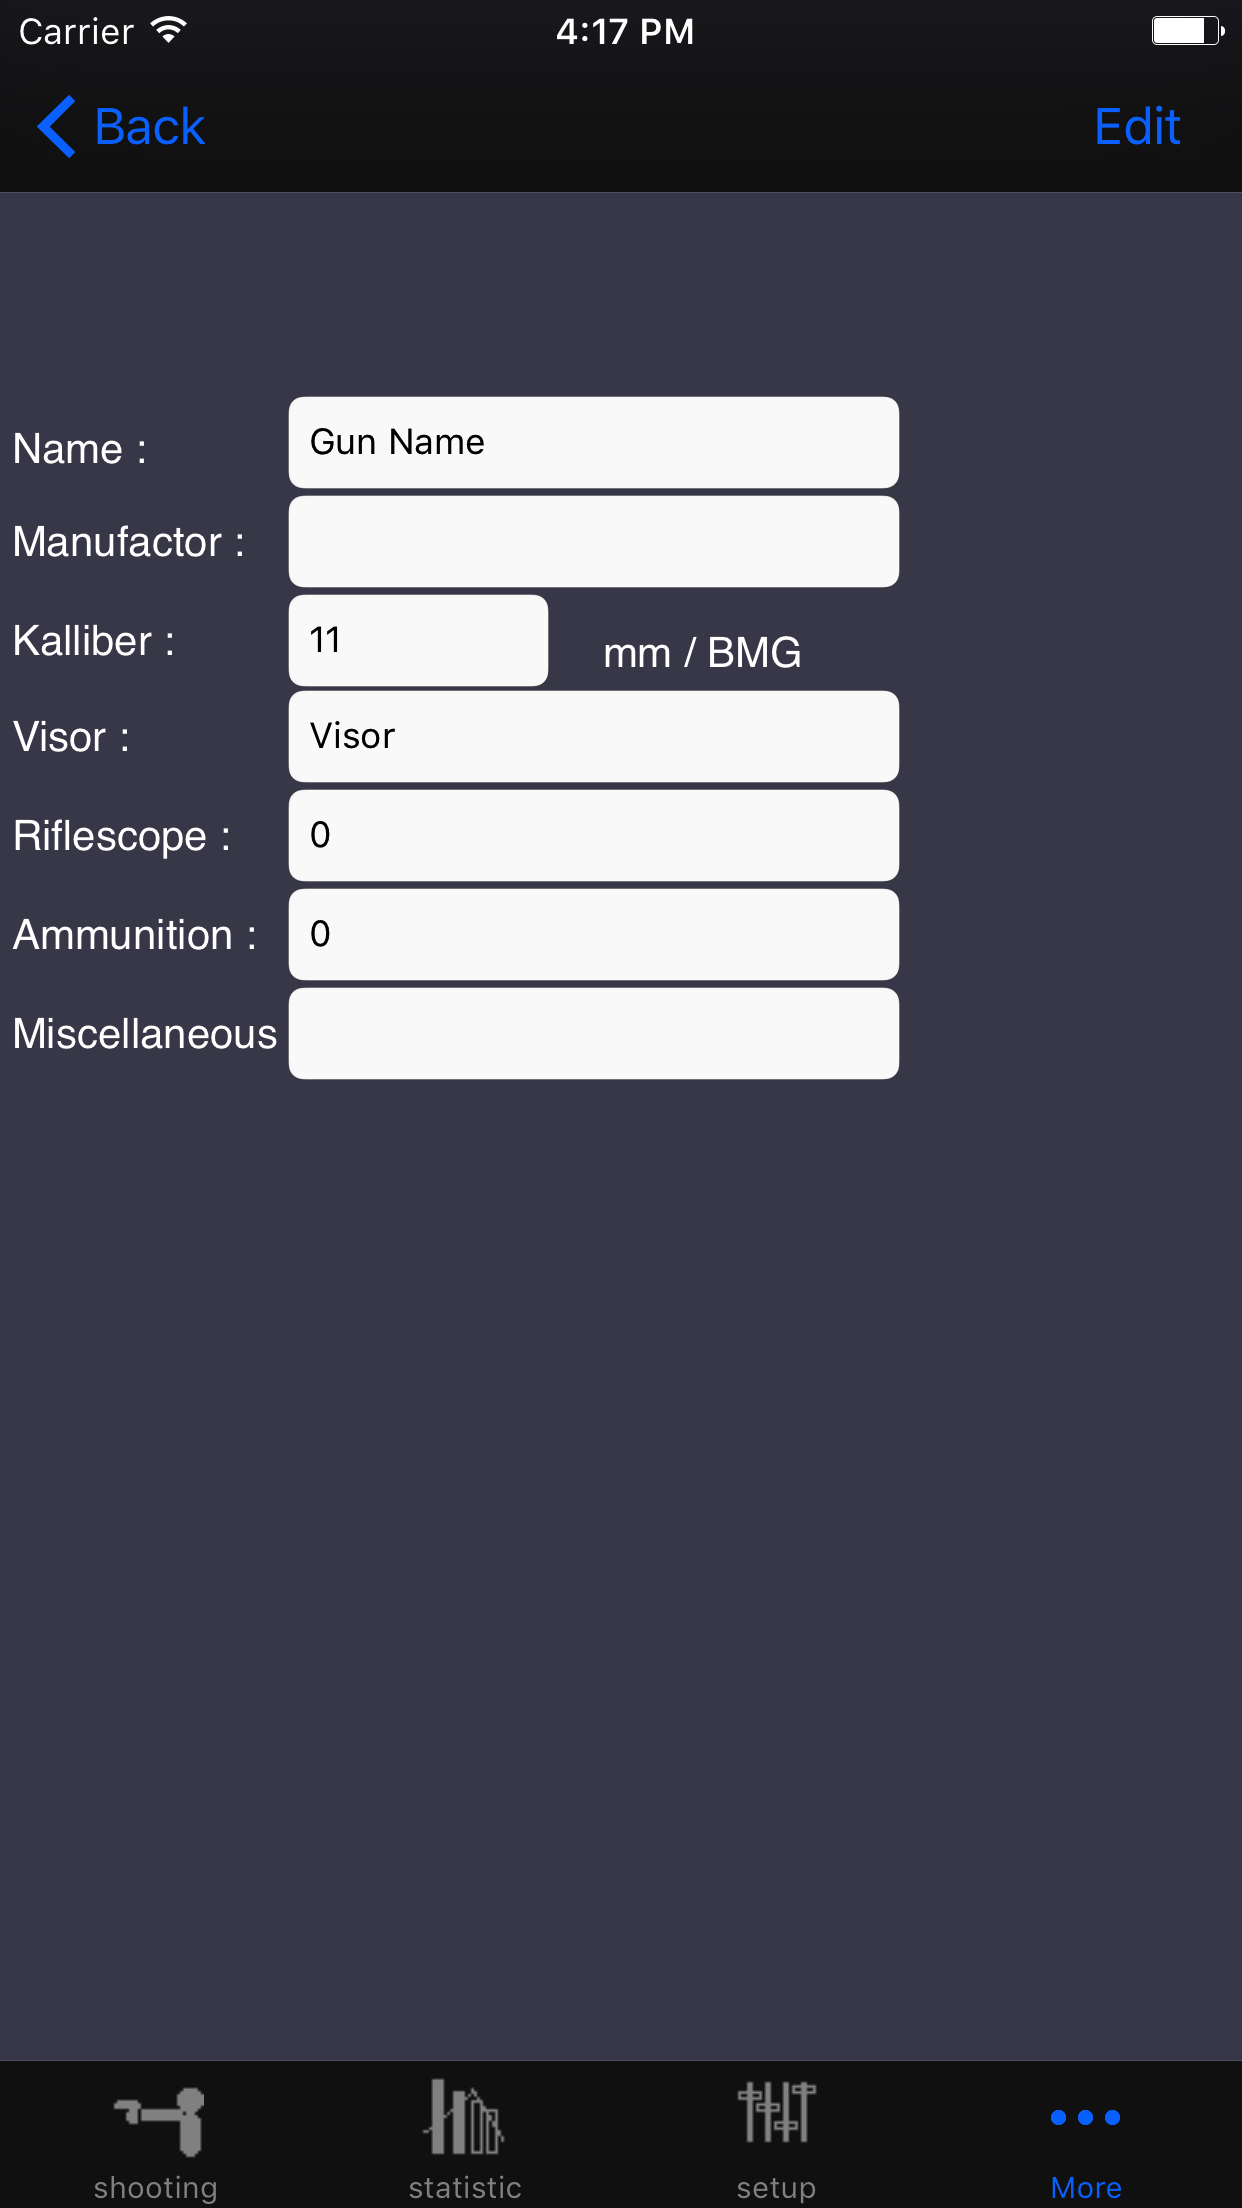
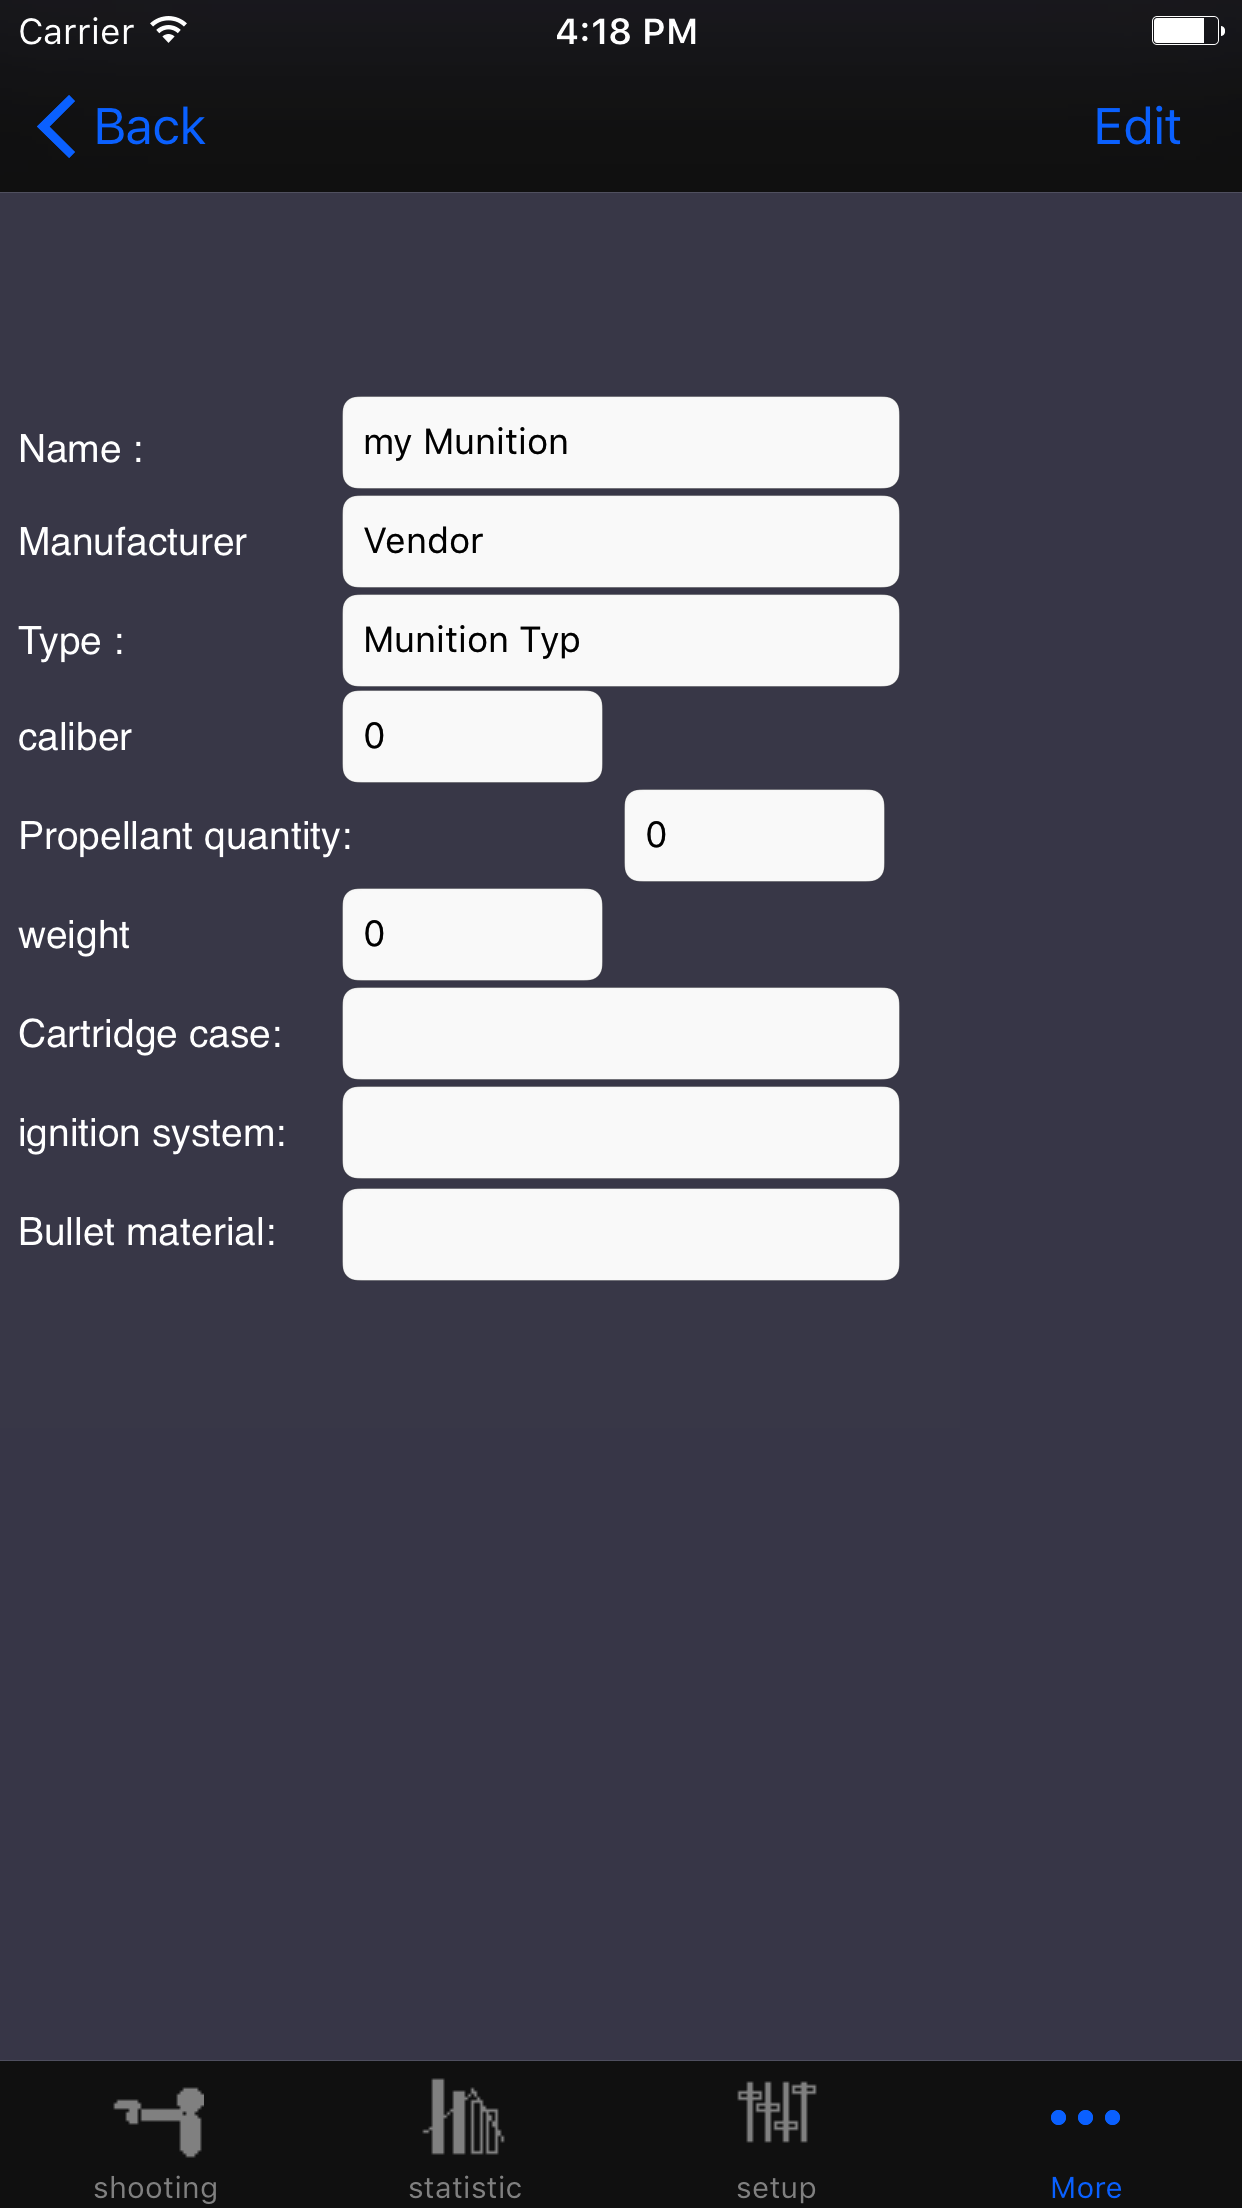
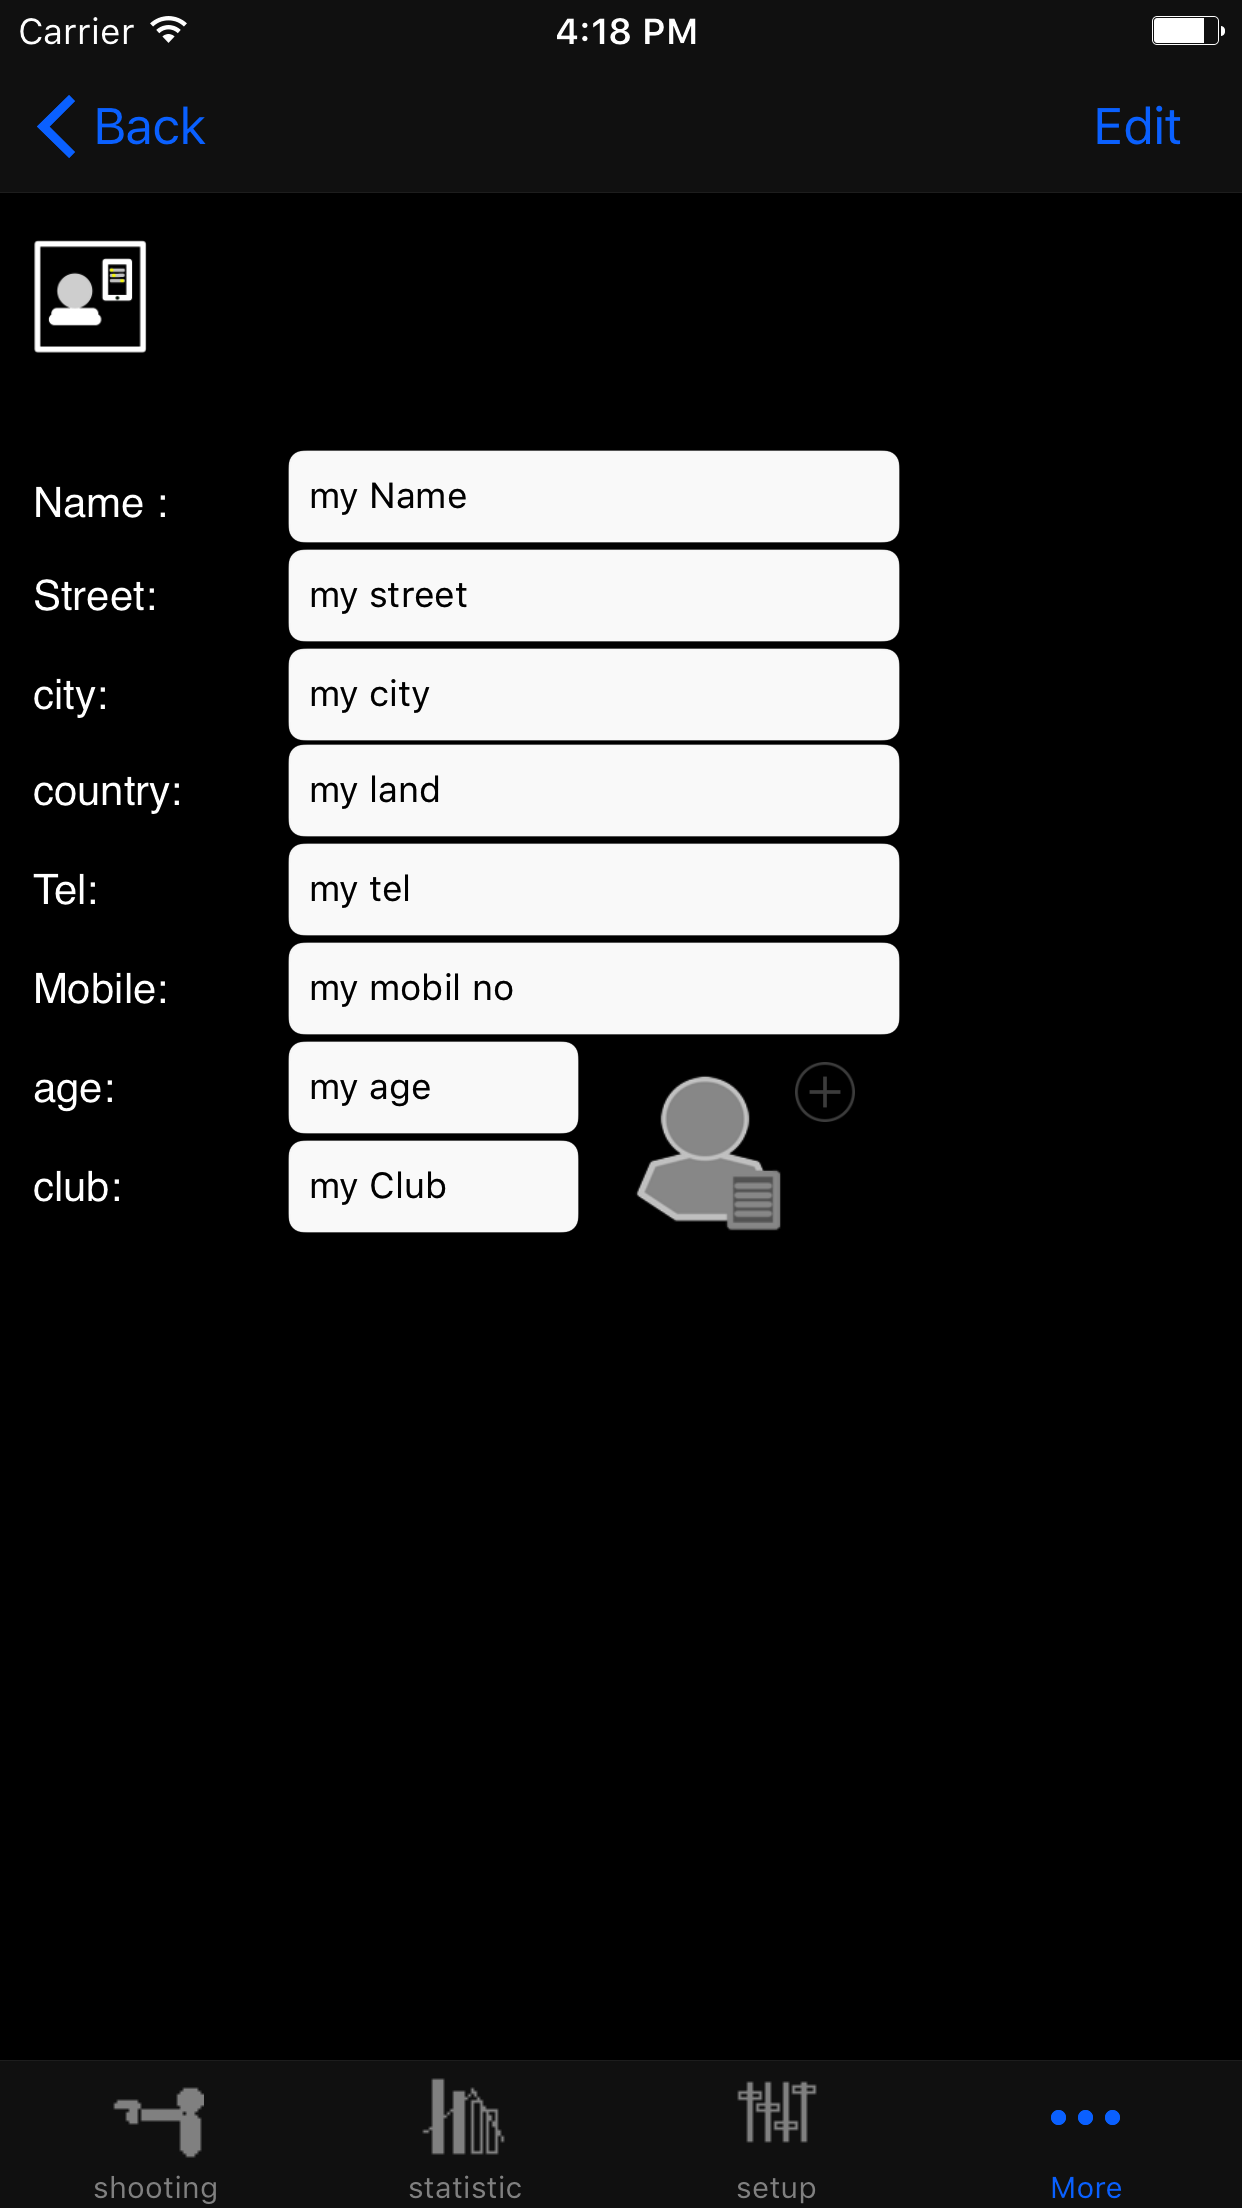
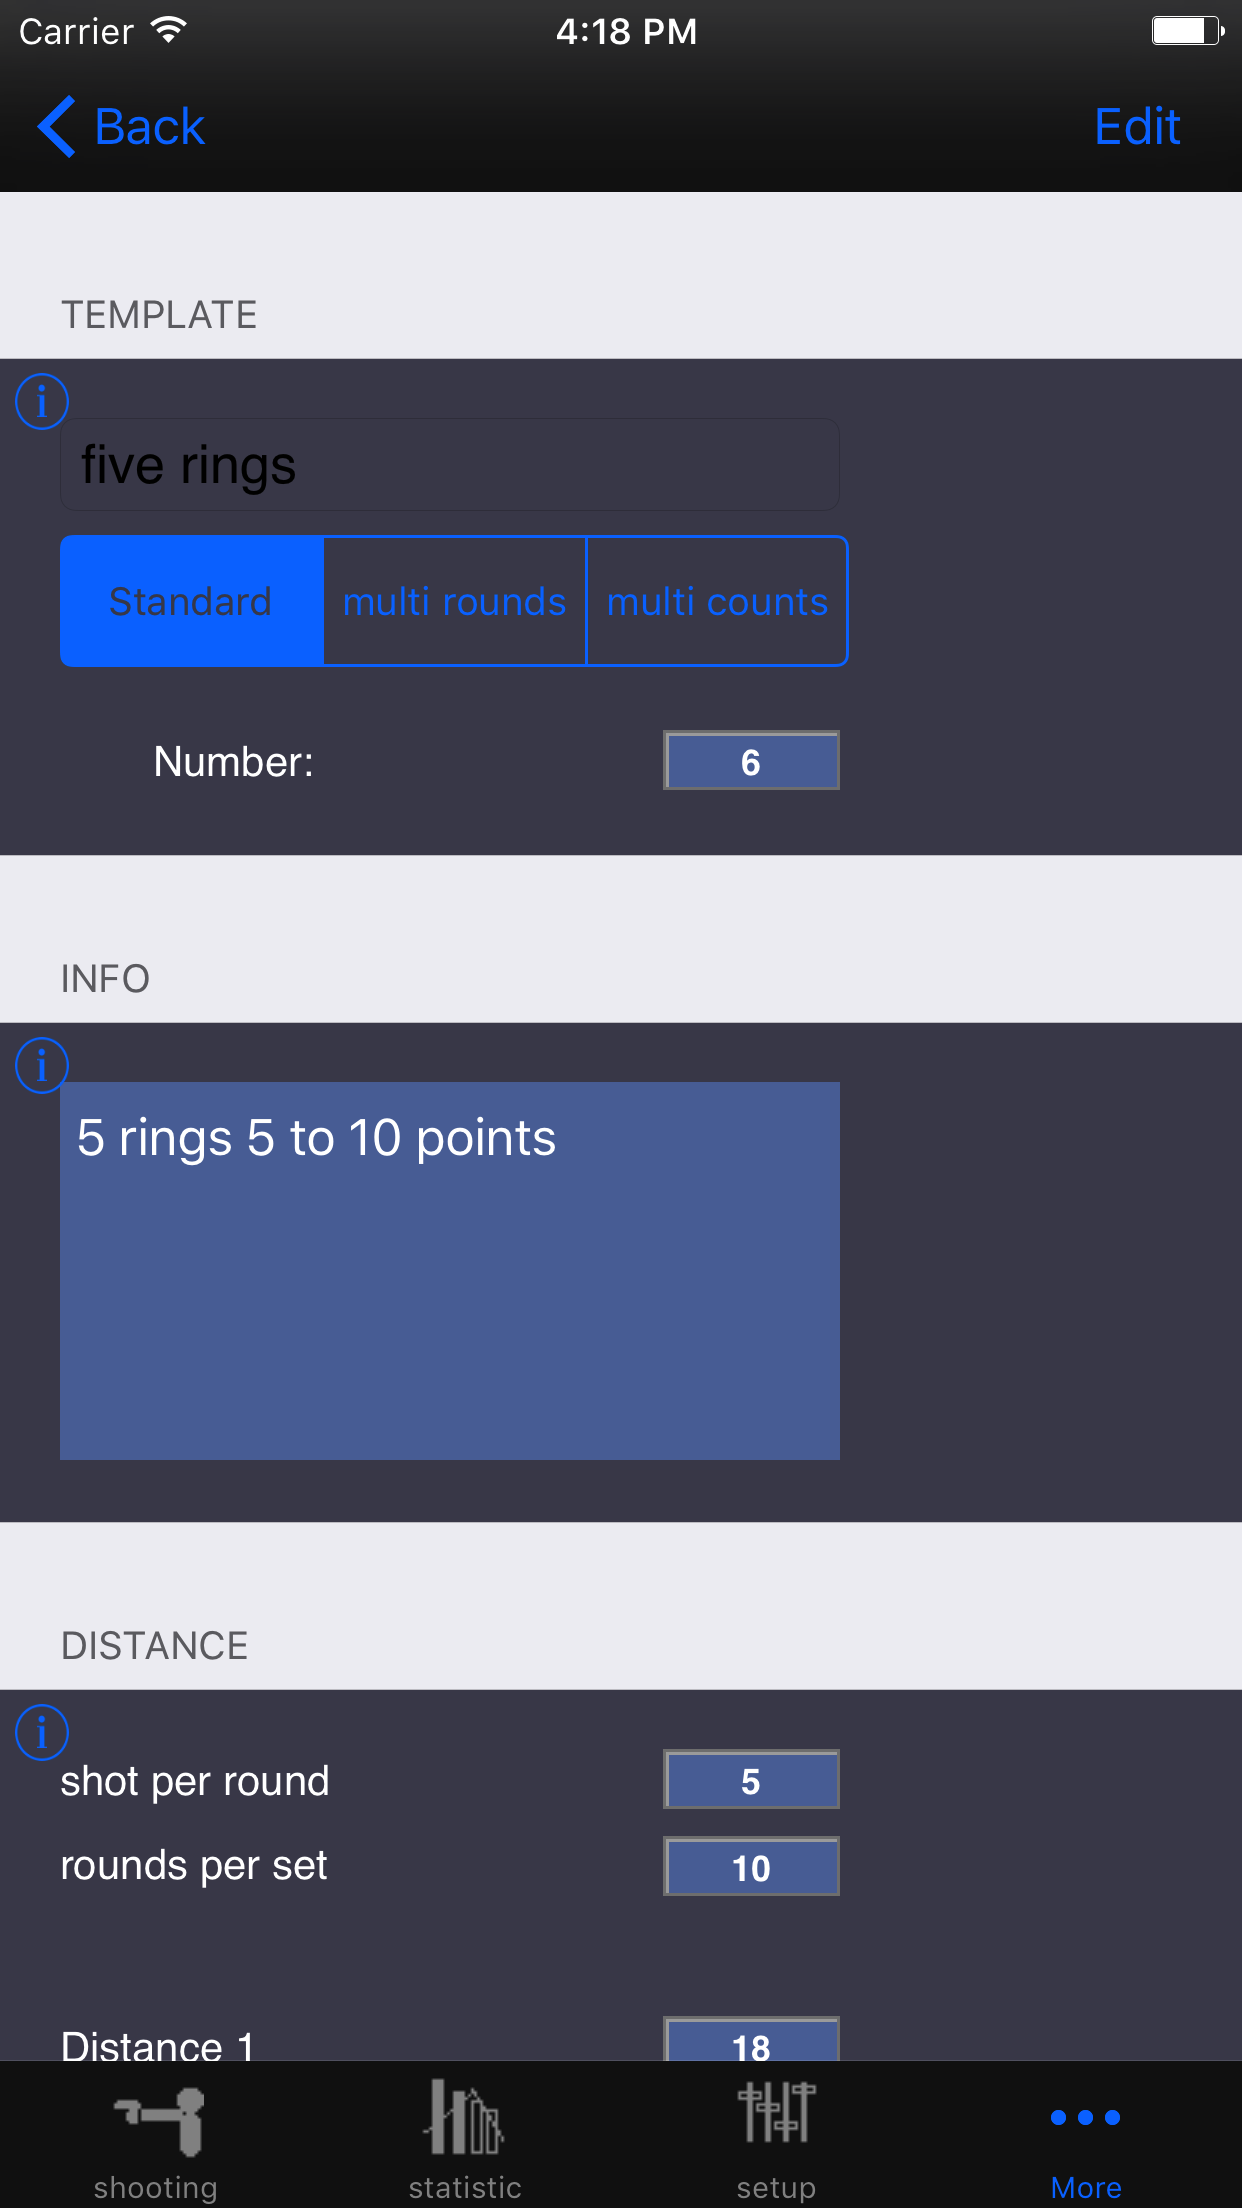
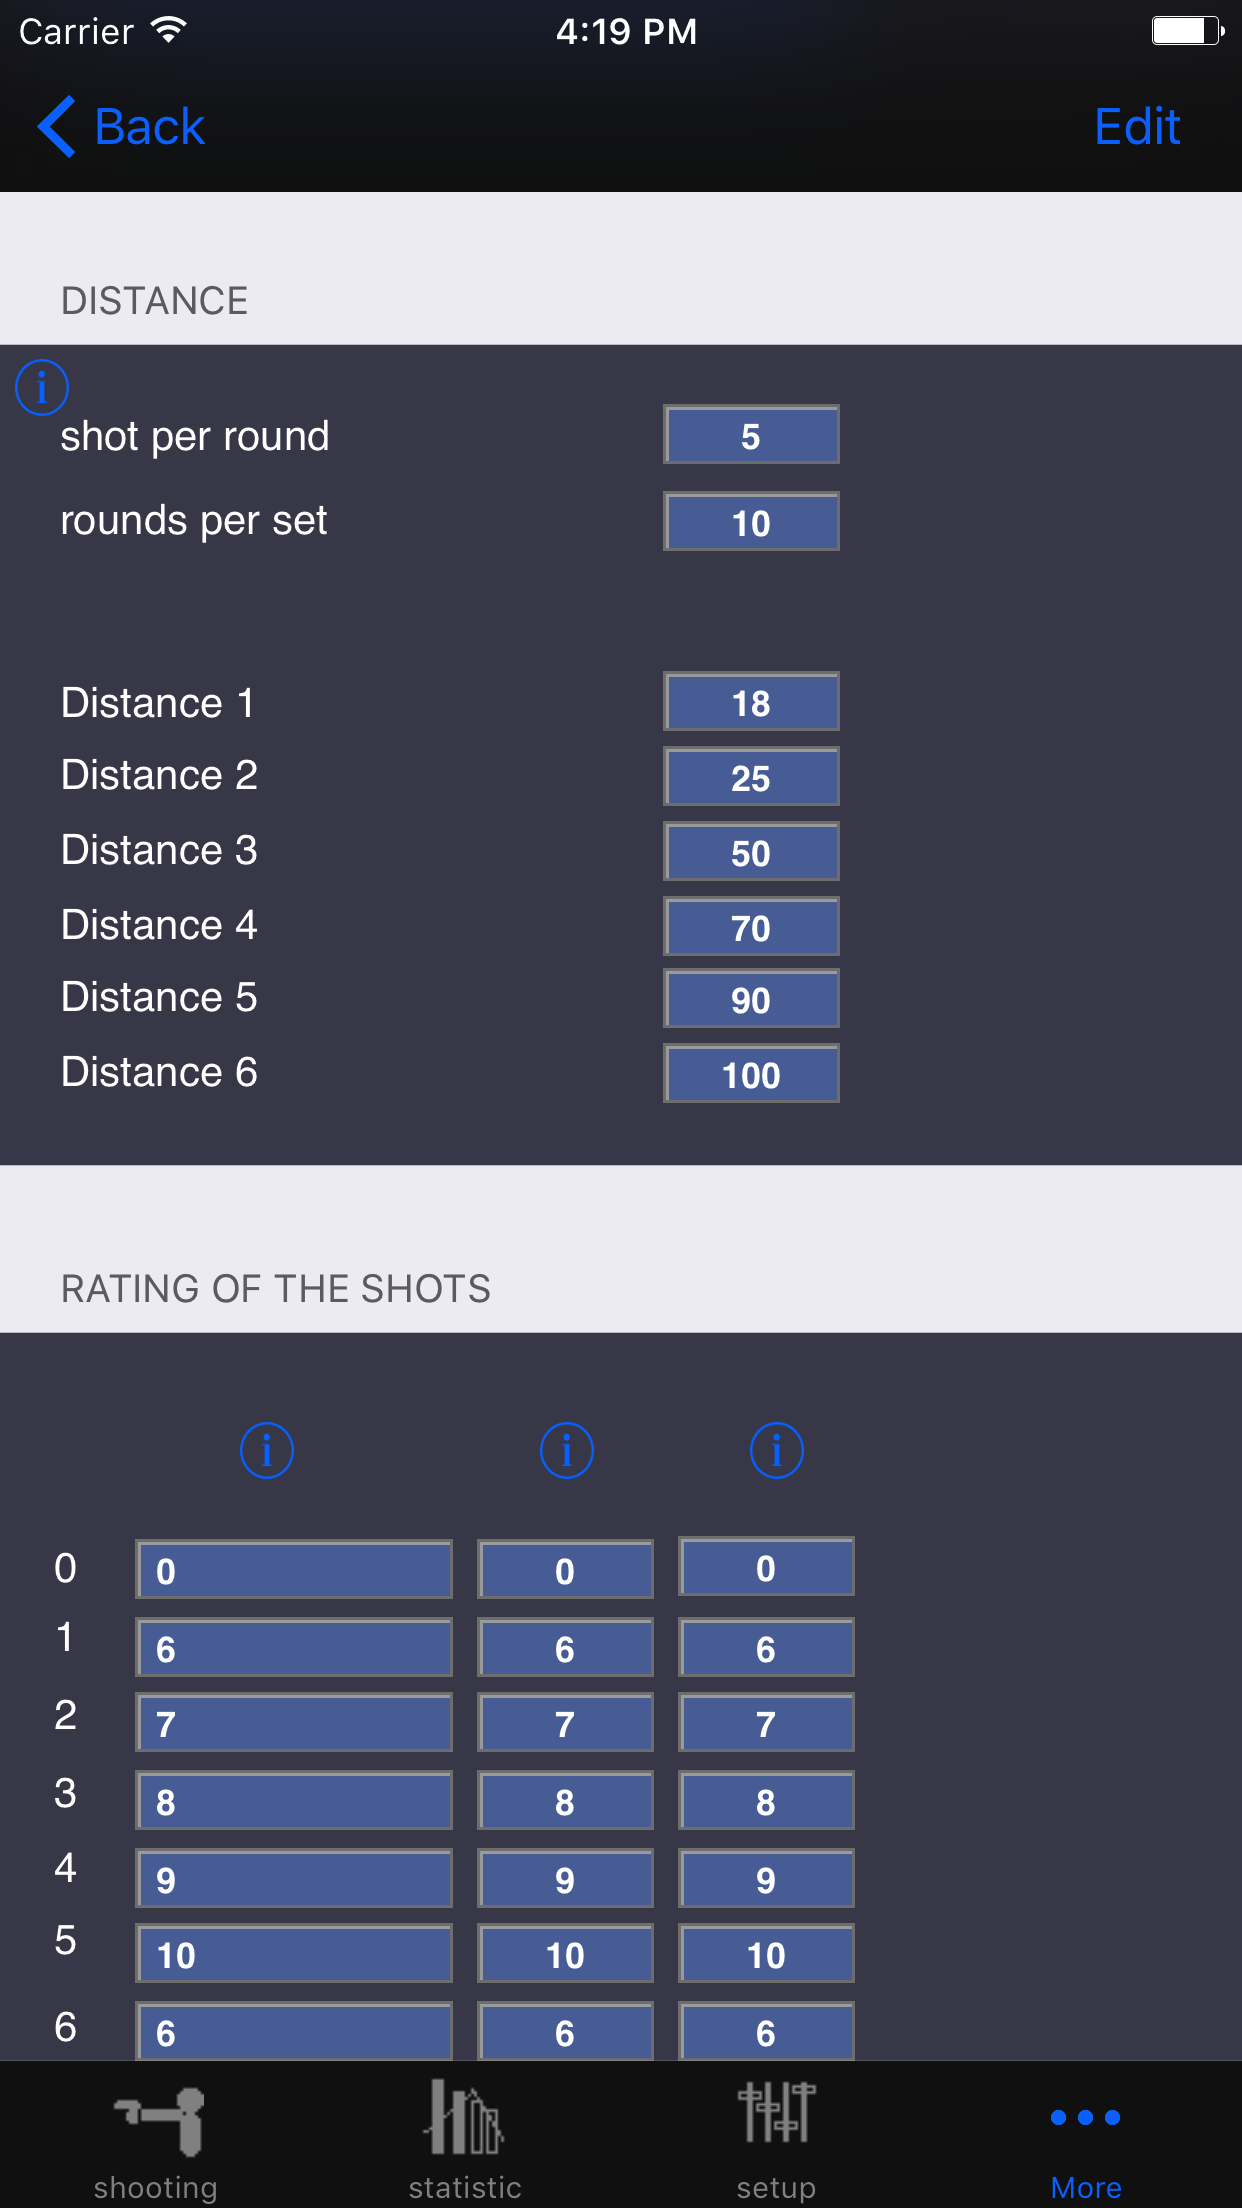
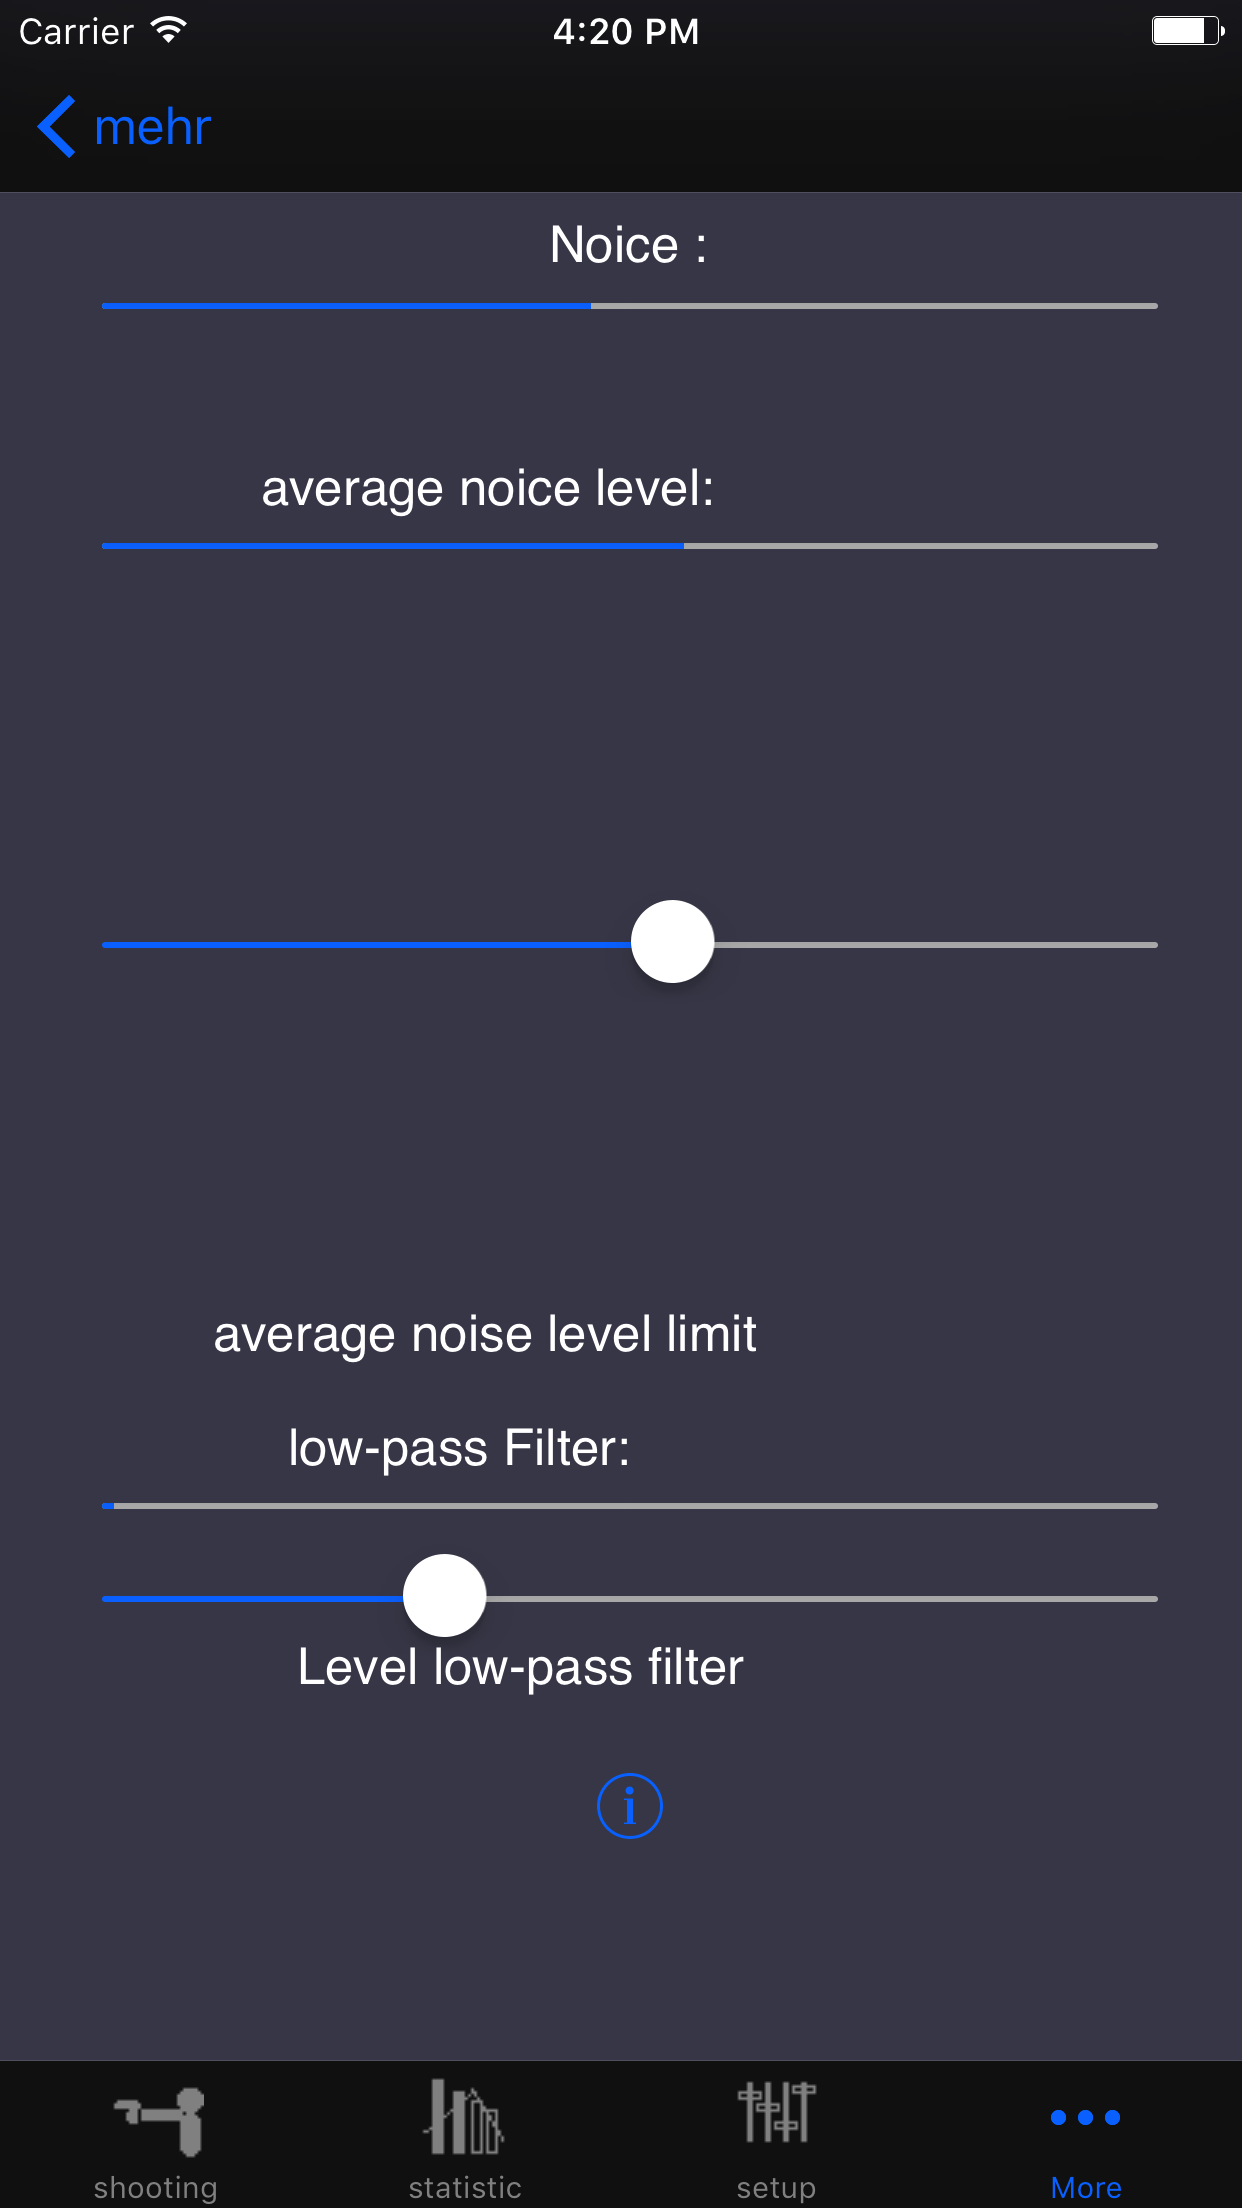
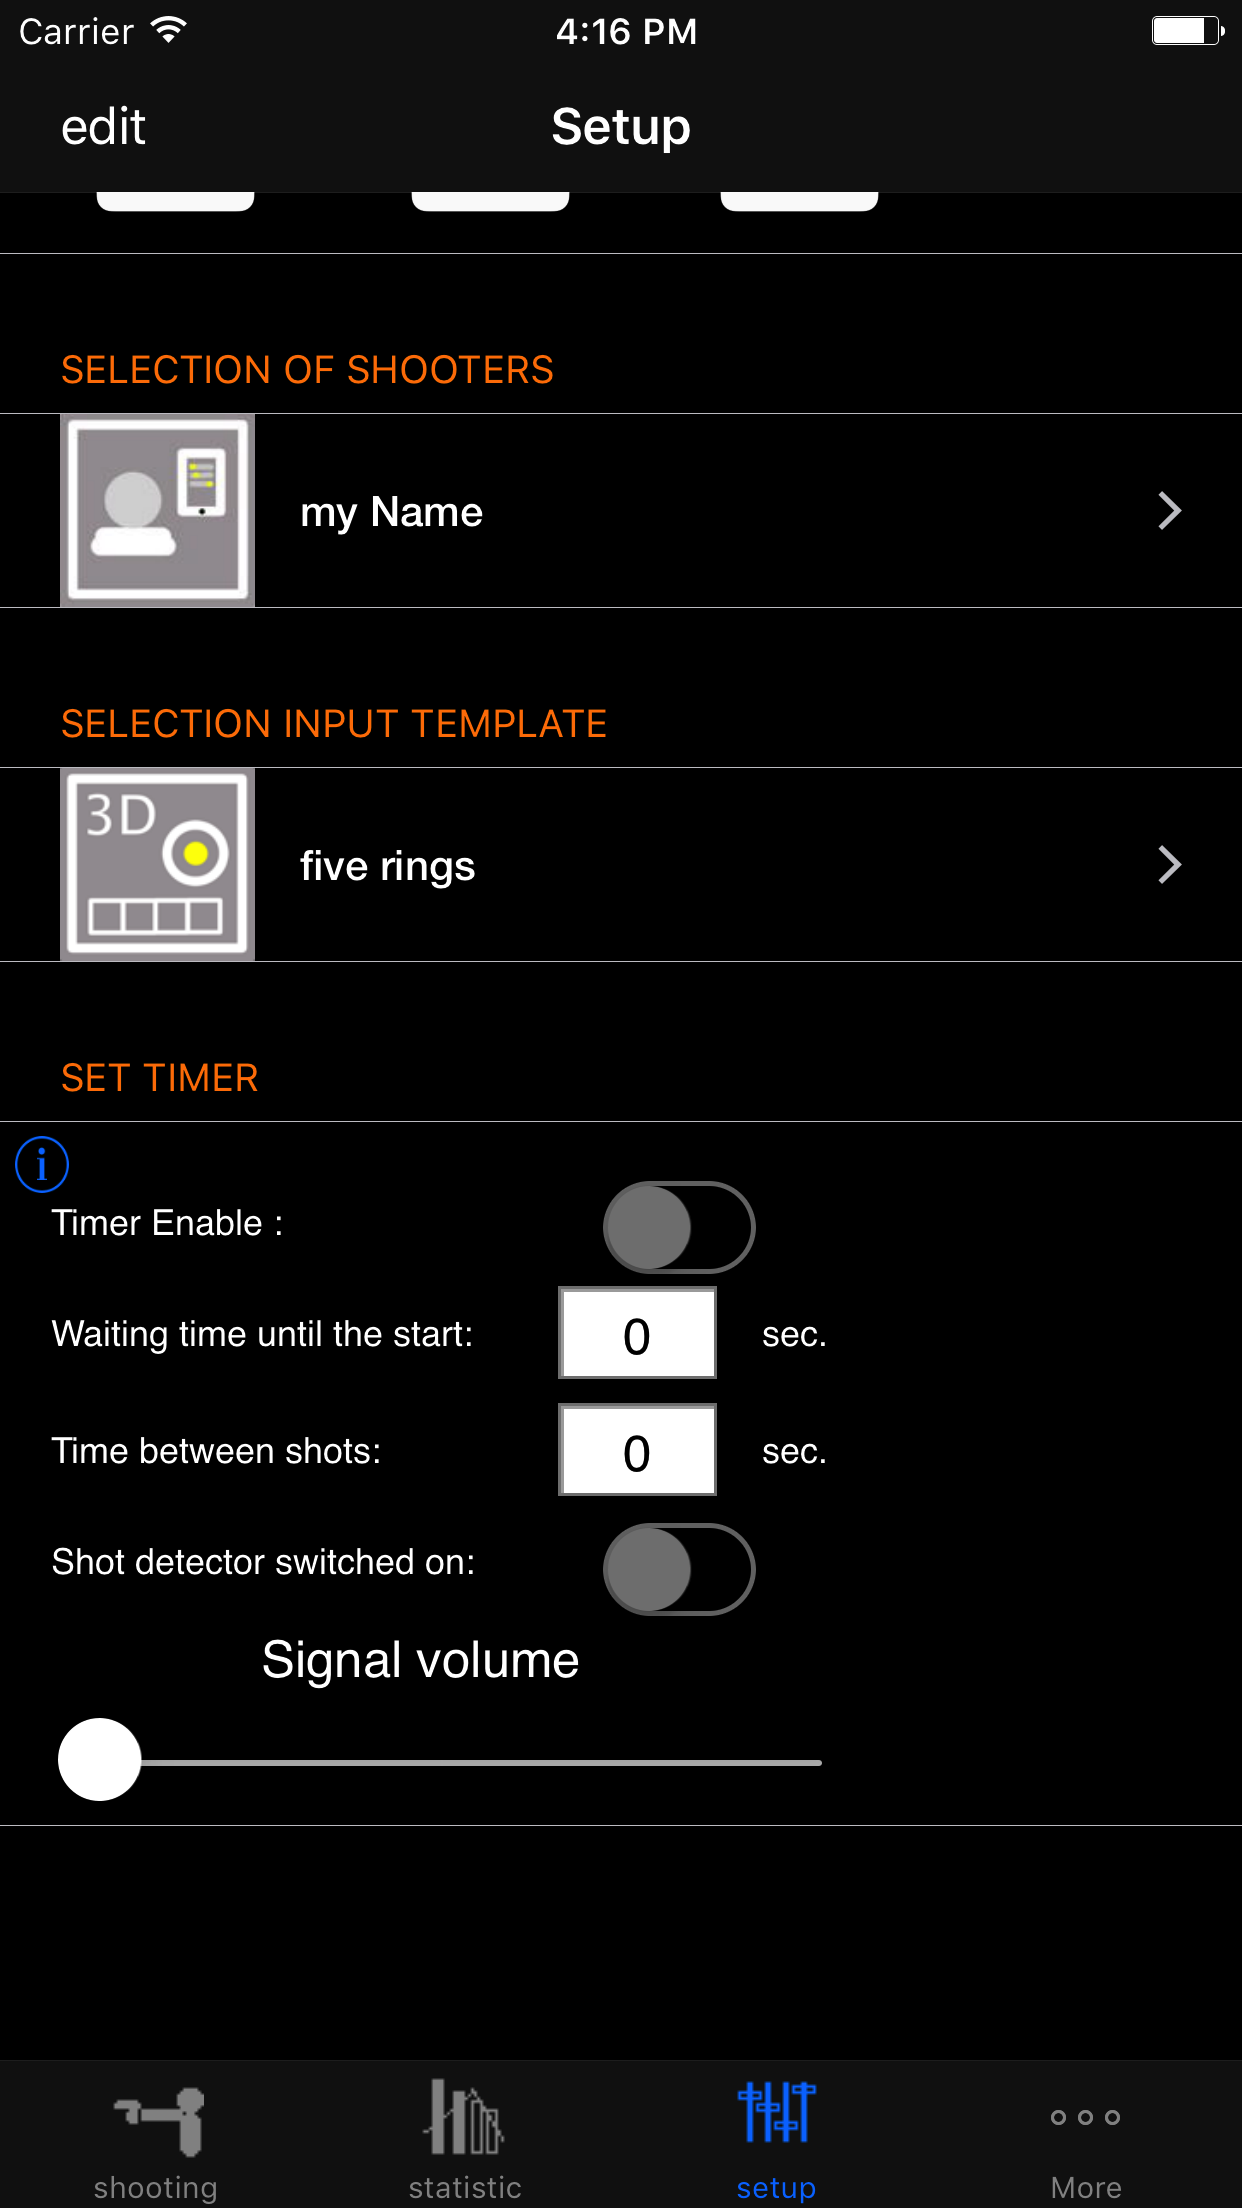
If you have started the app the first time, you need to set the in the setup menu as the minimum the number of sets per round         And enter the number of shots per set. Before editing, you must release the edit in the upper left corner         Edit select. At the end, you end your entry by clicking on the button at the top right.         If you change into the input mask now you can get started.         In addition, you have the possibility to enter the settings of the visor to later the same distance         Settings. If you add in the'more' menu gun, ammo or shooter to the database         You can select them as you like. So then the respective weapons or ammunition with the results         And can be evaluated with. Thus also from the different arcs and arrows the attitudes         Of your visor and will be available later.         Here in the setup menu you can also set whether you want e.g. Standard, speed shooting, appropriate         Input templates are available for selection. You can also create input templates yourself and use them accordingly.

Statistik

Here is the overview of your results. Through the horizontal scrolling of the bars you can get through        Move your results. The bar between the vertical lines is displayed below the bar graph as a detail value        displayed. Here you can also see the visor settings the name of the bow or the arrows used, as well as the distance, etc. If an info button is displayed next to the coordinates, you can tap it and see it        Map the place where you shot.

SETUP

Here you set the number of rounds per set and the number of shots per round. The setting of your       Visieres you can enter here, too, the corresponding shot is saved with the respective shot.       Under the heading "Shooter", you can specifically enter your settings, e.g. With which weapon you shoot or with       Which ammunition. If you want to record the results of several shooters, you can also select shooters here.       The selection of the weapons, ammunition and shooter you can only make here if you before in the menu -more- accordingly       Protection, weapons, and ammunition in the respective databases. The picture shows an example of 2 rounds per set and 5 rounds per round at a distance of 18 m. The visor settings can be adjusted as desired. As a shooter here is only a shooter selected, here you can also select several shooters and enter for all the shot rings. The default template is selected here, you can also select speed shooting, but also create your own templates via the menu template in the main menu "more". New entries are only accepted when the new record is started.

Visor adjustment

HHere you can see the visor settings you see in your shooting exercises    Selected weapons and ammunition and the distance. In the picture, only one setting is listed, but it can be as many as desired, more precisely all you have ever entered. First you see the distance, then the date, the name of the input template and the weapon, as well as the visor settings.

Sight adjustment search

You can search for the corresponding sight setting by using weapons, distance, ammunition, etc.. So you can quickly find the required visor setting.

Preferences

Here you set parameters for the app. You can delete all shooting results as well as delete the shooting data and weapon data together or start the repair of the databases if you have problems with the app. Here you can also set whether to shake the iPhone during the data input the whole sentence is to be deleted or whether you want to get a message at the beginning of a new sentence.

BOWS

Here you edit your database. You enter your weapons with the appropriate configuration and can    To select them later on shooting quickly and easily. Tap Edit to release the input mask to enter the data. This allows you to change existing data. To enter a new weapon, use the plus sign in the previous menu

Arrows

Here you can edit your ammunition database. You enter your ammunition with the appropriate configuration of the cartridge here and can    To select them later on shooting quickly and easily. Tap Edit to release the input mask to enter the data. This allows you to change existing data. To enter a new ammo, use the plus sign in the previous menu.

ARCHER

Here you managed your protection database. Here you can enter the shooters who shoot with you and they later easily    From the setup menu. You can also manage your data here.

TEMPLATE

If the template that the app already has not enough, you can build own templates here. You can take finished   And then copying them, then, e.g. Individual things. You can create very own stencils and then also these   Later on shooting. To make an entry, you must release the edit by tapping Edit. In the "Templates" group, the upper input field is the name of the template, it is freely selectable. There is a selection field where you can select the type, standard, multicurrency or multizähler. Number of ratings indicates the number of lines in the table of the group "Rating of shots". In the "Information" group, you can describe the template. The group distance includes the number of shots per series and the number of series per set. Then you can enter several different distances. The group "Rating of Shots" has three columns. The first column shows the name of the input field that is displayed when you enter it. The second column shows the number of the shot at which was shot. The last column shows the score for the respective input field. If you want to create your own templates, you can copy existing templates and make these adjustments, which makes it easier to create your own template.

DATA TRANSFER

Here you can select individual shooting results, check again, if necessary delete or also by email as    PDF file.

Edit results

Here you can select individual shooting results, check again, if necessary delete or also by email as    Download PDF file.

Schussdetektor

Here, you set the shot detector to the background noise to allow a reliable detection of the shot. Detects the shot detector    A shot to change the background color from dark gray to green.    The setting options of the timer are shown on the right. It is activated via timer via the setting "timer on". When shooting, a large countdown runs on the screen and you hear a beep. Optimal results are achieved with the use of the headphones. Then you can set the waiting time until the start of the round in the first input field. With the shot interval setting, you're setting a fast-paced successive shoot. If you switch on the shot detector with the last point, the reaction time is measured and stored with each shot.